
A loose cabinet handle starts wobbling every time you open the door. The bathroom tap develops an annoying drip. A bedroom door suddenly begins sticking. You remove a picture frame and discover a small screw hole staring back at you.
None of these problems necessarily means you need to call a tradesperson immediately.
Many DIY home repairs are surprisingly manageable when you have a few basic tools, understand what you are working on, and take sensible safety precautions. Tightening furniture, filling small holes, replacing deteriorated sealant and clearing a simple sink blockage are all useful skills that beginners can learn.
The important part is knowing where DIY ends.
Minor cosmetic and mechanical maintenance is very different from repairing electrical wiring, gas systems, structural damage or serious plumbing problems. If a job exposes you to hazards you cannot safely isolate or requires knowledge you do not have, bringing in a qualified professional is the sensible choice.
Quick Answer: Which DIY Home Repairs Can You Do Yourself?
Many common DIY home repairs are manageable for beginners with basic tools and appropriate safety precautions. Simple tasks such as tightening loose cabinet handles, adjusting furniture fittings, replacing worn adhesive bumpers and filling small cosmetic wall holes are often suitable starting points.
However, not every household problem is a safe DIY project.
- Beginner-friendly repairs: Loose screws, minor furniture adjustments, small cosmetic wall repairs and simple non-electrical maintenance.
- Basic tools: Screwdrivers, pliers, measuring tape, a suitable spanner and appropriate protective equipment.
- When to call a professional: Electrical wiring faults, gas leaks, structural cracks, major plumbing problems and repairs involving significant fall risks.
For Indian homeowners, apartment residents and renters, always consider building rules, landlord permissions and the condition of the property before starting a repair.
Our recommendation: Begin with small, low-risk tasks. Follow the manufacturer’s instructions, use the correct tools and stop if a repair requires specialist knowledge or creates a safety risk.
If you are still putting together your first toolbox, see 15 Essential Tools Every Homeowner Should Have in 2026 before getting started.
Quick Overview: 10 Easy DIY Home Repairs
| DIY Repair | Difficulty | Basic Tools Needed | Approx. Time | When to Call a Professional |
|---|---|---|---|---|
| Tighten cabinet handles and hinges | Very Easy | Screwdriver | 5–20 min | Damaged cabinet or hardware |
| Fix a squeaky door | Very Easy | Screwdriver, cloth, lubricant | 10–20 min | Damaged or badly misaligned hinges |
| Fix a sticking door | Easy | Screwdriver, level | 15–45 min initially | Frame movement or serious misalignment |
| Patch small wall holes | Easy | Putty knife, filler, sandpaper | Several stages plus drying | Large or recurring cracks, moisture damage |
| Unclog a slow sink | Easy | Plunger, gloves, basic hand tools | 15–45 min | Persistent/multiple blockages or leaks |
| Replace worn sealant | Easy | Removal tool, sealant, caulking gun if needed | 30–60 min plus curing | Significant hidden water damage |
| Tighten loose furniture | Very Easy | Hex keys, screwdriver | 10–30 min | Broken joints or structural components |
| Replace an interior door handle | Easy | Screwdriver | 20–60 min | Security or complex locking hardware |
| Address a simple dripping tap | Moderate | Screwdriver/wrench as applicable | Varies by faucet | Corrosion, damaged valves or hidden leaks |
| Hang a picture or lightweight shelf | Easy–Moderate | Measure, level, suitable drill/fixings | 20–60 min | Heavy objects or uncertain wall conditions |
These times are only rough planning ranges. The actual job can take considerably longer depending on the fitting, accessibility, condition of the house and your experience.
Before You Start Any DIY Home Repair
Before picking up your tools, check the following:
- Identify the problem: Make sure you understand what is loose, damaged, blocked or leaking.
- Check the risks: Look for electricity, hidden pipes, unstable fixtures, hazardous materials or other dangers.
- Gather the correct tools: Use tools and replacement parts suitable for the specific job.
- Read the instructions: Follow the manufacturer’s guidance for tools, fittings, sealants and other materials.
- Protect the work area: Keep the area clear, well-lit and away from children and pets.
- Know when to stop: If the repair involves unfamiliar wiring, gas, structural damage, serious plumbing or another hazard you cannot safely manage, contact a qualified professional.
Beginner tip: Start with a low-risk repair, such as tightening a cabinet handle, before attempting tasks that require drilling or disassembly.
1. Tighten Loose Cabinet Handles, Knobs and Hinges
Cabinet hardware gradually loosens because doors and drawers are opened thousands of times. Small movements and repeated loads can slowly work fasteners loose.
Fortunately, this is one of the easiest home repairs for beginners.
How to do it
- Open the cabinet or drawer and locate the fastener.
- Check the screw head before selecting a screwdriver.
- Use a driver that fits the screw properly rather than one that is merely “close enough.”
- Hold the handle or hinge in its correct position.
- Tighten the screw gradually until the fitting is secure.
- Test the door or drawer.
Avoid overtightening. Excessive force can strip a screw head, damage threads or crush softer cabinet materials.
If the same screw repeatedly loosens, simply tightening it harder may not solve the underlying problem. The screw, threaded insert, hinge or cabinet material may be worn.
Beginner tip: Photograph the hardware before taking anything apart. That simple reference can be surprisingly useful during reassembly.
Replace cracked, bent or badly worn hardware rather than trying to force it back into service.
Tools: Screwdriver set
2. Fix a Squeaky Door
Door hinges contain surfaces that move against each other. Dirt, wear or insufficient lubrication can make that movement noisy. Loose hinge screws can also contribute to the problem.
Start with the simplest approach
- Open and close the door slowly to identify which hinge is making the noise.
- Inspect the hinge screws and gently tighten any that are loose.
- Wipe dust and grime from the accessible hinge surfaces.
- Apply a small amount of lubricant intended for hinges or similar moving hardware, following the product instructions.
- Open and close the door several times to distribute it.
- Wipe away excess lubricant.
More lubricant is not necessarily better. Excess product can attract dirt or run onto painted surfaces and flooring.
Avoid reaching for random cooking oils, cosmetic products or other household substances simply because they feel slippery. Use a product intended and labelled for the application.
If a hinge is bent, badly rusted or physically damaged, replacement may be more appropriate than repeated lubrication.
Tools: Screwdriver, clean cloth, suitable hinge lubricant
3. Fix a Door That Sticks or Doesn’t Close Properly
A sticking door is not automatically a woodworking project.
The problem may be something as simple as loose hinge screws. Doors can also move slightly because of humidity, swelling, hinge wear or alignment changes.
Start with the least invasive possibilities.
Step 1: Inspect the hinges
Look for loose screws, hinge movement or obvious damage.
Step 2: Tighten loose fasteners
Secure loose hinge screws carefully and test the door again.
Step 3: Check alignment
Look at the gaps around the closed door. Are they reasonably even? Does one corner appear lower than the other?
Step 4: Find the rubbing point
Open and close the door slowly and identify exactly where it catches.
Only after understanding the cause should you consider more invasive work.
A common beginner mistake is immediately sanding, cutting or aggressively planing the edge of the door. If a loose hinge is actually causing the problem, removing material from the door can create a new problem without solving the original one.
If several doors suddenly become difficult to close, the frame has noticeably shifted, large cracks have appeared nearby, or you suspect movement in the building, consider professional inspection rather than treating it as a simple door adjustment.
4. Patch Small Nail and Screw Holes in a Wall
Removing hooks, screws and small wall fixings often leaves cosmetic holes. Small, stable holes in suitable wall surfaces are generally straightforward to repair.

A basic method
- Remove loose or flaking material around the hole.
- Wipe the area clean.
- Apply an appropriate wall filler or spackle using a small putty knife.
- Follow the product instructions for application depth and drying time.
- Once completely dry, sand the repair lightly with fine sandpaper if required.
- Remove the sanding dust.
- Apply matching touch-up paint.
Do not turn every crack into a cosmetic filling exercise.
Large cracks, cracks that repeatedly return, spreading cracks, bulging surfaces, damp patches or damage associated with movement deserve further investigation. Filling over moisture damage without correcting the source merely hides the symptom.
Older buildings may also contain hazardous materials that should not be disturbed casually. If you suspect asbestos-containing material, stop before sanding, drilling or cutting it and seek appropriate professional advice.
Tools: Putty knife, suitable wall filler, fine sandpaper.
5. Unclog a Slow-Draining Sink
A slow sink is often caused by hair, soap residue or other debris near the stopper or accessible portion of the drain.
Start with the least aggressive solution.

What beginners can try
- Remove accessible visible debris while wearing suitable gloves.
- If the sink has a removable stopper designed for user access, remove and clean it according to its design.
- Try a suitable sink plunger and use it correctly for the drain configuration.
- If you understand how the accessible trap beneath the sink is assembled, it may sometimes be removed for cleaning. Place a container underneath first and inspect the joints for leakage when reassembled.
If you are unfamiliar with the plumbing or the fittings are corroded, seized or fragile, stopping before disassembly may prevent a small blockage from becoming a leak.
Never mix drain-cleaning chemicals
Never combine drain cleaners or experiment by mixing household cleaning products.
CDC/NIOSH guidance warns against mixing bleach with ammonia-containing cleaners because it can release dangerous gases. More broadly, follow product labels and avoid mixing cleaning chemicals.
If chemical drain cleaner has already been used, be especially cautious before opening plumbing or plunging because hazardous liquid may remain in the drain.
Call a plumber for persistent blockages, recurring sewage smells, leaking pipework, backups or several drains becoming blocked at the same time.
6. Replace Worn Sealant/Caulk Around a Sink or Bathroom Fixture
Sealant closes vulnerable gaps around sinks, countertops, baths and some bathroom fixtures. Once it cracks, separates or deteriorates, water may find its way into places that are difficult to dry.
Replacing a straightforward bead of deteriorated sealant can be a useful DIY maintenance skill.

General process
- Carefully remove loose old sealant with an appropriate removal tool.
- Remove remaining residue as recommended for the surfaces involved.
- Clean the joint.
- Allow it to dry thoroughly.
- Choose a sealant specifically suitable for the location and materials.
- Apply a controlled, continuous bead.
- Smooth it according to the manufacturer’s directions.
- Keep the area dry and undisturbed for the manufacturer’s specified curing period.
Do not assume all sealants cure in the same amount of time. Product chemistry, bead size, temperature and humidity can affect application and curing requirements.
Also investigate why the old sealant failed. Persistent dampness, movement or water entering from elsewhere may indicate a larger problem.
Tools: A suitable sealant-removal tool or utility knife, cleaning materials, and a sealant and caulking gun where required.
7. Tighten Loose Furniture
Beds, dining chairs, tables, shelving units and flat-pack furniture can loosen gradually as joints and fasteners experience repeated movement.
Regular inspection can catch the problem before the furniture becomes noticeably unstable.
How to tighten furniture safely
- Identify which joint is moving.
- Find the fastener responsible.
- Select the correct Allen/hex key, screwdriver or other specified tool.
- Tighten the fasteners gradually rather than forcing one as tight as possible immediately.
- Check neighbouring fasteners.
- Place the furniture normally and test its stability.
Overtightening is a common beginner mistake. Flat-pack panels and threaded inserts can be damaged by excessive torque.
If a chair leg is cracked, a bed frame has a broken structural joint, shelving is separating from its supports, or furniture remains unstable after the fasteners are correctly tightened, proper repair or replacement may be required.
Building your first toolkit? See Best Tool Kits for Home Use in India for practical starter options.
8. Replace a Damaged or Worn Interior Door Handle/Knob
A conventional mechanical handle or knob on an interior door can often be replaced with basic hand tools.
This advice does not apply to electronic locks, complicated security systems or unfamiliar entrance-door locking hardware.
Basic approach
- Inspect the existing handle from both sides.
- Note its dimensions and configuration before purchasing a replacement.
- Choose compatible hardware designed for the door.
- Open the door before starting so you cannot accidentally lock yourself in or out.
- Remove accessible mounting screws carefully.
- Keep screws and small components together.
- Remove the old components without forcing them.
- Install the new hardware according to its manufacturer’s instructions.
- Test the handle repeatedly with the door open.
- Finally, test that the latch engages and releases correctly.
Do not assume all handles share identical dimensions or installation methods.
For entrance doors, security locks, multipoint systems or hardware that affects home security, professional locksmith installation may be preferable.
9. Repair a Small Dripping Tap/Faucet — Only When the Cause Is Simple
A dripping faucet is often described online as a universal “change the washer” repair. Modern faucets make that advice unreliable.
Compression taps, cartridges, ceramic-disc designs and other systems use different internal components and repair procedures.
Take a conservative approach
- Identify the faucet brand and type if possible.
- Look for the manufacturer’s maintenance or parts instructions.
- Locate the correct water shut-off.
- Make sure the water supply can actually be isolated before disassembling anything.
- Protect the sink and cover the drain so small components cannot disappear down it.
- Disassemble only as instructed for that faucet.
- Replace worn components with compatible parts.
- Reassemble carefully.
- Restore the water supply gradually.
- Inspect the faucet and connections closely for leaks.
Manufacturer guidance from Moen, for example, instructs users to shut off the water supply before faucet repairs because failure to isolate the supply can cause flooding or injury.
If the shut-off valve does not work, fittings are badly corroded, plumbing begins moving when you apply a wrench, water continues leaking after repair, or leakage appears inside a wall or cabinet structure, call a plumber.
A minor drip is not worth creating a major water leak.
10. Hang a Picture, Mirror or Lightweight Shelf Correctly
Hanging something securely teaches one of the most important principles in DIY:
The fixing must suit both the wall material and the load.
A screw that works well in solid timber may not be suitable by itself in hollow plasterboard, masonry or another substrate.
Plan before drilling
- Decide exactly where the item will go.
- Measure carefully.
- Use a spirit level where alignment matters.
- Identify the wall material as confidently as possible.
- Check for possible hidden electrical cables, plumbing or other services before drilling.
- Select fixings designed for the wall material and application.
- Follow the fixing manufacturer’s installation and load instructions.
- Mark the drilling points accurately.
- Drill only when you understand what is behind the surface and can do so safely.
- Install the fixing and check that the item is secure.
Do not rely on a universal wall-anchor weight rating. Capacity depends on the fixing design, substrate, installation quality and how the load is applied.
Heavy mirrors, cabinets, televisions and other substantial wall-mounted objects can create serious injury and property-damage risks if the mounting fails. Use an appropriately designed mounting system and consider professional installation where necessary.
Tools: Tape measure, spirit level, suitable fixings and drill/driver where appropriate.
If you’re ready to add a drill to your DIY toolkit, see our Best Cordless Drills for Home Use in India buying guide.
Essential Tools for Basic DIY Home Repairs

You do not need a workshop full of equipment to start learning basic home maintenance.
A compact beginner collection might include:
- Screwdriver set
- Claw hammer
- Combination pliers
- Adjustable wrench
- Tape measure
- Utility knife
- Spirit level
- Allen/hex keys
- Cordless drill/driver
- Flashlight or work light
- Appropriate basic safety equipment
If you’d rather buy the basics as a starter set, see our Best Tool Kits for Home Use in India guide.
The objective is not to own as many tools as possible. It is to have dependable tools that fit the jobs you genuinely perform.
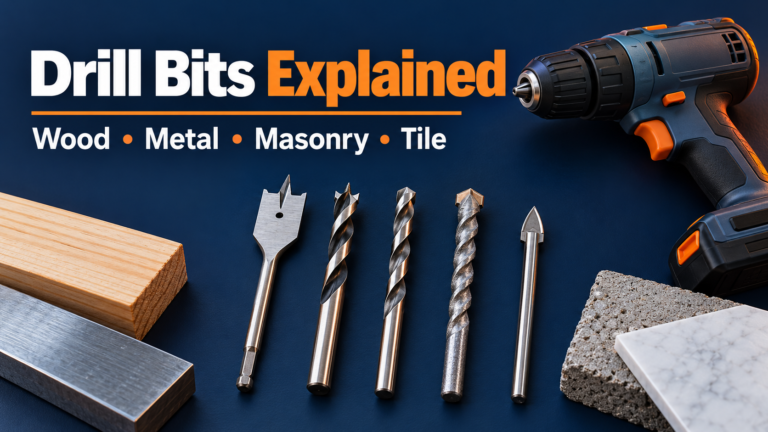
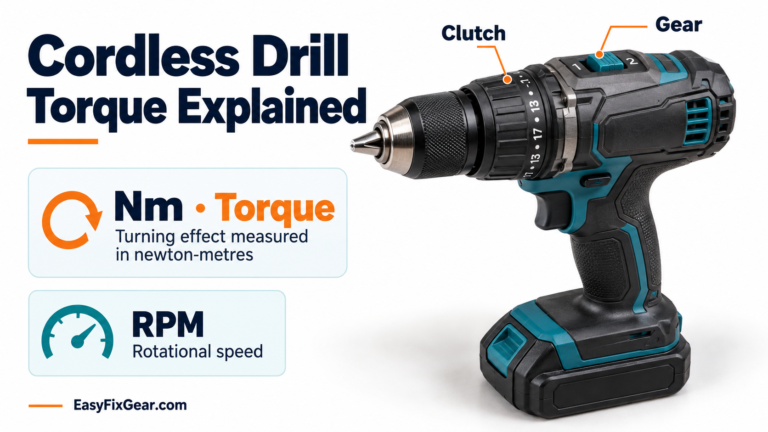
Not sure which type suits occasional household work? Our Cordless vs Corded Drill comparison explains the trade-offs before you buy. Understanding cordless drill torque and choosing the right drill bit is also important before buying a drill for DIY.
DIY Home Repairs: What You Should NOT Attempt as a Beginner
Saving a call-out charge should never take priority over safety.
Electrical work
Fixed wiring, circuit breakers, electrical panels, damaged wiring and unidentified electrical faults require appropriate competence. Electricity can cause severe injury, fire and property damage.
Do not improvise electrical repairs.
Gas appliances and gas lines
Do not attempt DIY repairs on gas lines, gas controls or unfamiliar gas appliances. Use an appropriately qualified professional.
Major plumbing
Burst pipes, sewage problems, hidden leaks, failed isolation valves and water entering walls or floors can cause extensive damage. Bring in a plumber when the problem goes beyond simple accessible maintenance.
Structural repairs
Foundation movement, serious cracks, damaged load-bearing elements, sagging structures and significant roof damage are not beginner DIY projects.
Working at dangerous heights
Roof repairs and other work where a fall could cause serious injury require appropriate access equipment, training and precautions. Do not improvise platforms or overreach from ladders.
Hazardous materials
Do not casually cut, sand or drill materials that may contain asbestos or other hazardous substances. EPA guidance notes that asbestos cannot reliably be identified just by looking at a material and recommends professional assessment when suspect material will be disturbed.
Hazards involving lead-containing coatings and substantial mould contamination may also require specialist precautions or professional remediation.
A useful rule is:
If you don’t understand the system, cannot isolate the hazard safely, or aren’t confident that the repair is within your skill level, stop and call a qualified professional.
Essential DIY Safety Rules for Beginners
Good DIY is not just about completing the repair. It is about completing it without creating a new hazard.
- Read the instructions supplied with tools, fixings, adhesives, sealants and replacement components.
- Wear appropriate eye protection where chips, dust, splashes or flying particles are possible.
- Use gloves where they are suitable for the task, while remembering that some rotating machinery may have specific manufacturer warnings about glove use.
- Keep the work area well lit.
- Keep children and pets away from tools, chemicals and the active work area.
- Use the correct tool and correctly sized bit or driver.
- Inspect tools before use and do not use visibly damaged equipment. OSHA guidance requires hand and power tools to be maintained in safe condition.
- When using a utility knife, control the workpiece and cut away from your body.
- Before changing drill bits, blades or accessories, follow the tool manufacturer’s isolation procedure; this may include unplugging the tool or removing/disconnecting its battery.
- Check for hidden cables, pipes and other services before drilling into walls, floors or ceilings.
- Follow ladder instructions, use the correct ladder for the task and place it on a stable surface.
- Never improvise repairs to electrical or gas systems.
- Follow chemical labels and never mix cleaning products.
- Stop if a straightforward job exposes unexpected wiring, serious corrosion, water damage, structural movement or anything you do not understand.
Hand and power tool safety guidance notes that hand and power tools can cause severe injuries when used or maintained improperly, which is why basic tool condition and correct use matter even on small household jobs.
How Much Money Can DIY Home Repairs Save?
There is no meaningful universal figure.
The financial benefit depends on your location, professional call-out charges, replacement parts, the complexity of the repair and whether you already own the required tools.
Buying a ₹5,000 tool solely to avoid one inexpensive service visit, for example, is different from owning a basic screwdriver set that you use repeatedly for years.
DIY generally makes the most financial sense for simple, repeatable and low-risk maintenance jobs.
There is also a cost to getting DIY wrong. A damaged fitting, stripped screw, broken pipe or incorrectly mounted object can make the eventual professional repair more expensive.
Think in terms of risk and repeat usefulness, not simply “DIY is always cheaper.”
How to Become More Confident With DIY
Confidence should grow with competence.
Start with: tightening screws, measuring accurately, identifying tools and assembling simple furniture.
Then try: filling small cosmetic holes, replacing straightforward sealant and mounting lightweight objects with appropriate fixings.
Later: learn proper drilling techniques, understand different wall materials and gradually take on more involved maintenance.
One useful skill learned properly is worth more than a cupboard full of tools you do not understand.
Learn what each tool does, read its instructions and practise on low-risk jobs before progressing.
Once you’re comfortable with basic repairs, use our Ultimate Home Maintenance Checklist to identify routine monthly, seasonal and annual tasks before small problems become bigger ones.
Frequently Asked Questions
What home repairs can I do myself?
Beginners can often handle jobs such as tightening cabinet hardware, fixing squeaky hinges, filling small cosmetic wall holes, tightening furniture, replacing simple interior door hardware and clearing minor accessible drain debris.
What is the easiest DIY home repair for beginners?
Tightening loose handles, knobs and furniture fasteners is a good starting point. It requires few tools, lets you practise choosing the correct screwdriver or hex key and carries relatively little risk when done carefully.
What basic tools do I need for home repairs?
A screwdriver set, hammer, pliers, adjustable wrench, tape measure, utility knife, spirit level, hex keys, flashlight and suitable safety equipment cover many simple jobs. A cordless drill/driver can be added as your skills develop.
Is DIY home repair actually cheaper?
It can be, particularly for simple jobs you perform repeatedly with tools you already own. Savings vary by location, parts, professional charges and complexity. Incorrect DIY can instead increase the final repair cost.
What repairs should homeowners never DIY?
Beginners should avoid fixed electrical wiring, gas-system repairs, major plumbing, structural work, hazardous materials and dangerous-height work unless they have the required competence, equipment and legal authorisation.
Can beginners use a cordless drill?
Yes. A cordless drill/driver can be beginner-friendly when used according to its manual. Learn its controls, select the correct bit, secure the work where appropriate and check for hidden services before drilling into building surfaces.
How can I learn basic home maintenance?
Start with low-risk tasks and learn one skill at a time. Read manufacturer instructions, understand your tools before using them and use trustworthy instructional resources rather than relying on unsafe social-media shortcuts.
Should I buy individual tools or a complete home tool kit?
A well-selected tool kit can be convenient for beginners who own very few tools. Buying individually may be better if you already have some essentials or want specific higher-quality tools. Prioritise useful full-size tools over inflated piece counts.
Conclusion: Small DIY Skills Can Make a Big Difference
Learning DIY home repairs is not about turning yourself into an electrician, plumber or carpenter.
It is about developing enough practical knowledge to deal confidently with small household problems: tightening a loose hinge, filling a picture-hook hole, resealing a sink edge or recognising when a repair has moved beyond your abilities.
Start with easy jobs. Learn how your tools work. Read product and manufacturer instructions. Work carefully rather than quickly.
Most importantly, know your limits.
When electrical systems, gas, structural damage, hazardous materials, serious plumbing or significant safety risks enter the picture, professional expertise is more valuable than proving you can do the job yourself.
For the next step, read 15 Essential Tools Every Homeowner Should Have in 2026 and Best Tool Kits for Home Use in India to build a practical beginner toolkit without buying equipment you are unlikely to use.